This guide lists all you need to know regarding how to Sign up, and complete steps such as Verification, Submitting a Transfer order, and Tracking your order on Rebit Money Transfer. Follow the how-to guide below to learn simple steps and useful tips for a smooth experience while sending money on the Rebit Money Transfer web app. If this how-to guide didn’t answer your question, please check our Help and Support.
1- Create Account
 Sign up
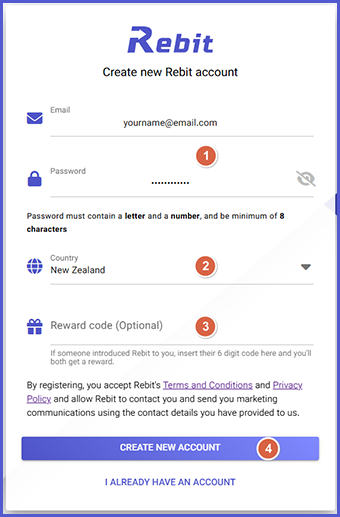
Start with Sign up:
- Enter your Email and create a Password (must include a letter, a number, and be at least 8 characters).
- Select the country from which you are registering.
- If someone introduced Rebit to you, enter their 6-digit reward code here to receive a reward!
- Click on “Create New Account”.
 Activate your account
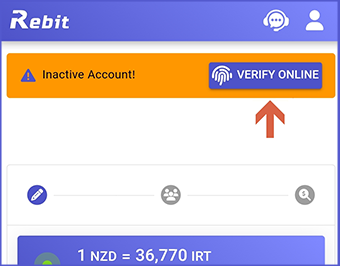
- To activate your Rebit account, complete your Verification.
- Click on “VERIFY ONLINE”
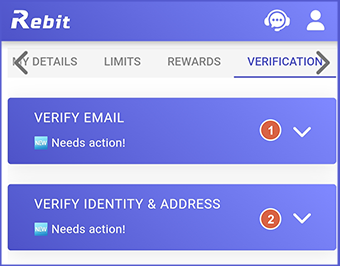
 Complete all steps
Two steps of verification need to be completed.
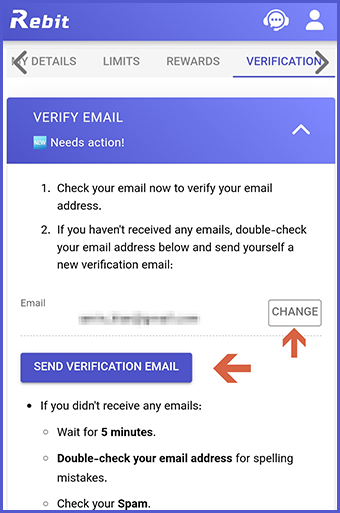
 Verify email
You should have received a welcome email with a link to confirm your email. If you have not received the email, check your Spam folder or tap on SEND VERIFICATION EMAIL again
Please note: If you have misspelled your email address, click on CHANGE to correct it.
 Verify identity
- I live in
Select the country you currently live in. If you have recently migrated, this refers to your new address. - Account type
If you need Rebit for your business (ie. your payments will be into or paid from your business bank account), switch the “Account type” to BUSINESS. - Verification method
If you live in Australia or New Zealand, the AUTOMATIC method works best with an Australian or New Zealand driving licence or passport.
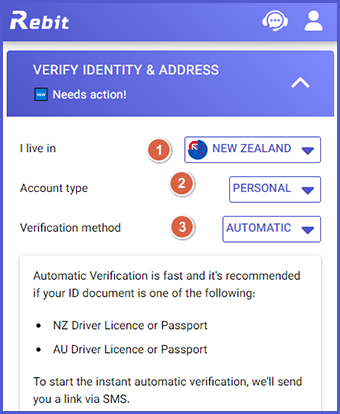
 Automatic verification
In most cases you must select the AUTOMATIC method and get a link to the AplyID biometrics system.
Once you completed the AUTOMATIC method, check your email for the results. We’ll let you know if we require additional documents such as Address Proof, etc. In that case, follow the instructions to upload a tenancy agreement, bank statement, electricity bill, etc.
Manual Verification
When we ask you to use the MANUAL verification method, make sure you have attached ALL the documents requested before you click SUBMIT.
- ID document ( any of Passport / Driving licence / National ID card), and
- Proof of address, and
- Selfie photo of you holding your ID
2- Submit Your Order
 Select your route
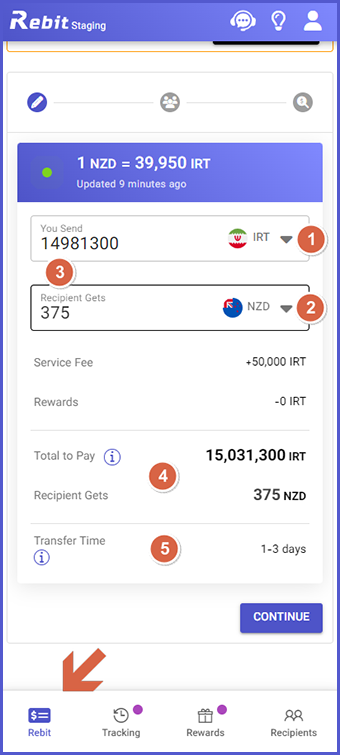
The REBIT or SEND MONEY tab is the main area where you can submit your order.
- Select the currency you pay. This is the origin of your transfer.
- Select the currency you get. This is the destination of your transfer.
- You can type in the amount in either field.
- Pay attention to the ‘Total to Pay’ including Fees.
- Pay attention to the ‘Transfer Time’window.
 Send more, get better rates
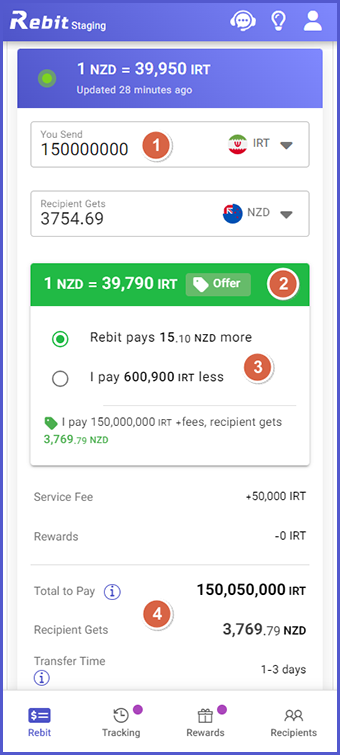
In some routes, we have tiered pricing, where you can get a better rate based on your volume.
- To get an offer, just try a higher amount.
- Click on the green bar to see price brackets.
- Choose your discount type. You can get more or pay less.
- Review final amounts.
CONTINUE to the next step.
NOTE:
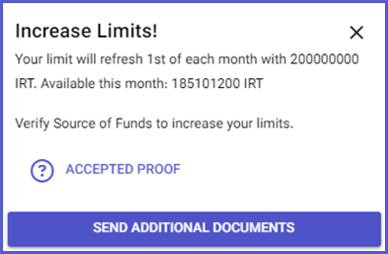
- To view your current limits, visit the LIMITS tab in the Account section.
- To view the list of documents for the source of funds, check here: EN | FA
- To send your documents and increase your limits, head to the VERIFICATION tab.
 Add or select a Recipient
- If you’ve previously sent money to this person, simply choose their name from your list of saved recipients.
- If this is your first time sending money to them, you must create a new recipient.
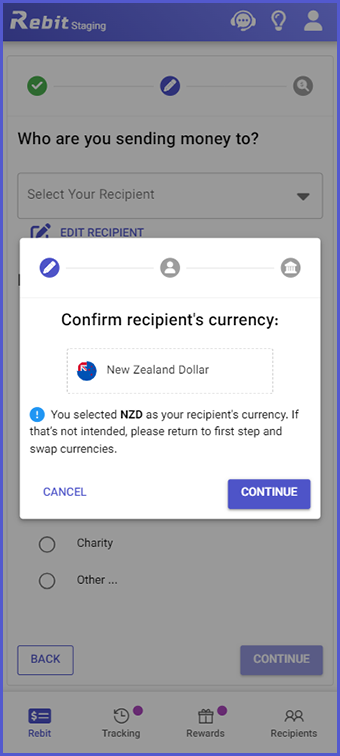
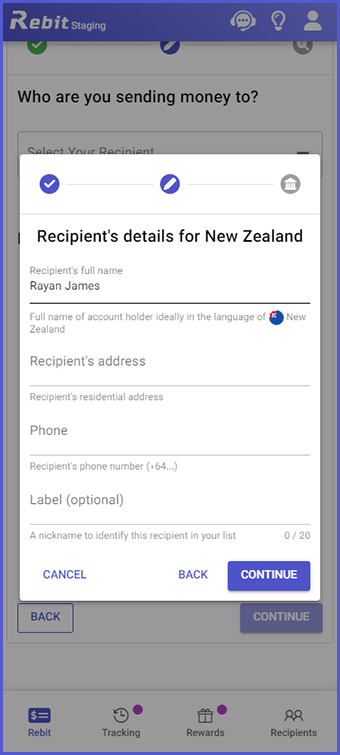
 Recipient Name:
- Enter the recipient’s full name, not just their first name.
- Ensure the recipient’s name is written in the correct format for their local language.
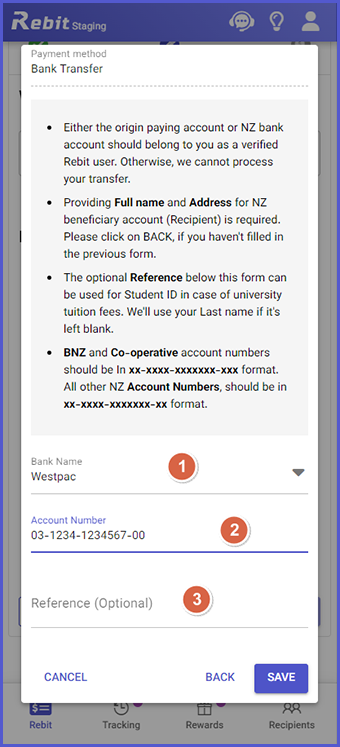
 Bank Details
Provide the recipient’s information as required, to ensure accuracy and prevent delays.
- Bank Name: Choose the recipient’s bank from the drop-down menu.
- Bank Details: Enter the recipient’s account number, IBAN, or other required bank details based on the selected transfer method.
- Reference Field (Optional) Use this field for additional information, like:
Student ID for tuition payments
Invoice Number for business payments
Confirm & Save: Review all details carefully before submitting to avoid any errors or delays in the transaction.
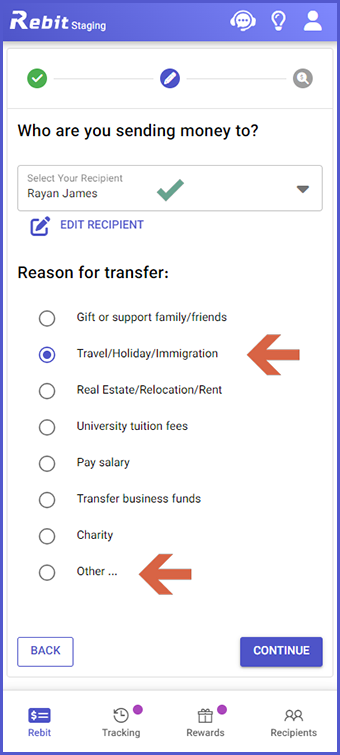
 Reason for Transfer
- The recipient has been successfully added.
- Next, select the reason for transfer from the provided options or choose ‘Other’ if your reason is not listed.
 Review and submit
- Double-Check Amounts: Ensure the total amount to pay is correct.
- Double-Check Recipients: Ensure recipient details are correct.
- Pay attention to Transfer Time: Although most of our orders are processed very quickly, plan accordingly as this is an estimated window.
- Add Notes (Optional): Add notes such as the payment due date or any special requests and we try our best.
Click ‘Submit’ to complete the process.

 Confirmation
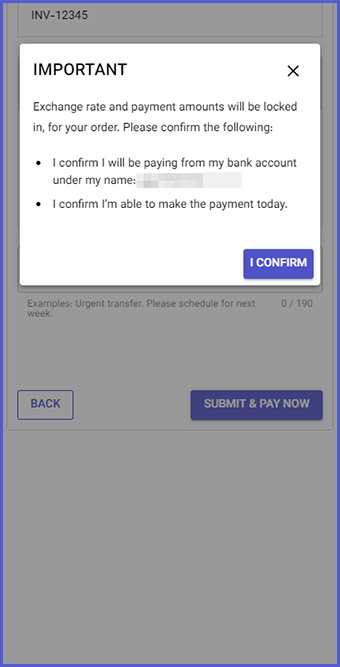
To submit your order, confirm the following:
- Ensure payment is made from your own bank account under your name.
- You’re able to complete the payment immediately after submitting your order.
After successfully placing your order:
- You should have received an email with the Subject: REBIT-ABC123: New order received!
Check your email and follow the provided instructions.
You can also find the just-created order in the TRACKING area.
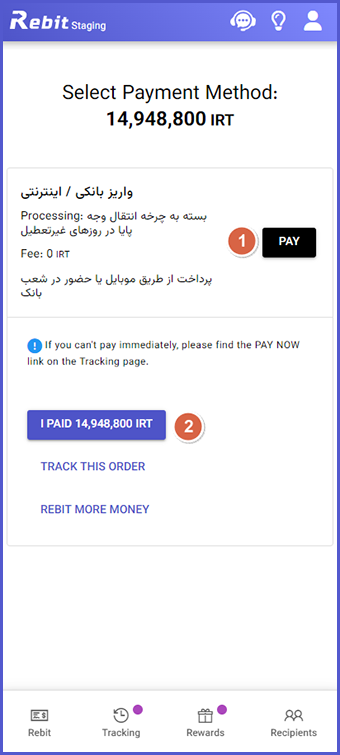
 How to pay?
- On the next screen, click on PAY to find out.
- You may receive a bank account allocation right away.
- Alternatively, you may be asked to wait, until we send you payment instructions via another email. (ie. Subject: Ready To Pay)
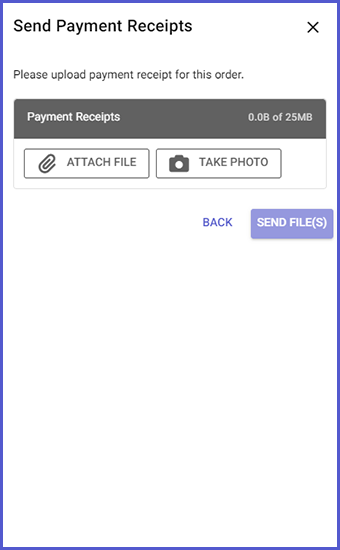
 Upload Receipts
2. Once completed your payment, please upload the receipt.
3- Track Your Transfer
 Details & Timeline
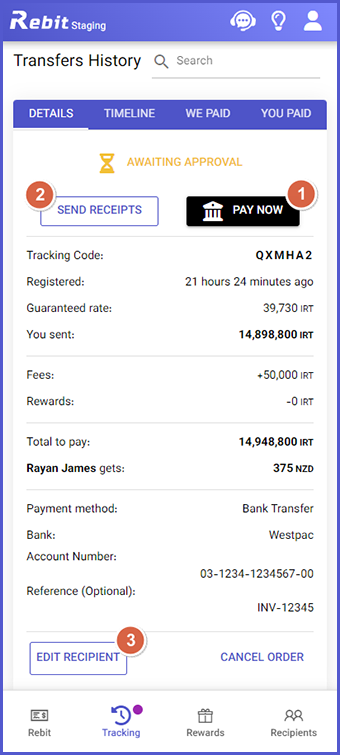
The TRACKING area provides a complete history of your orders, lets you check their status, and displays all the accounting details you need.
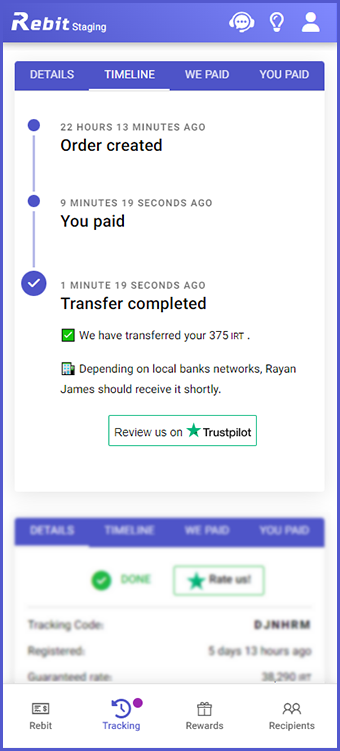
There are 4 tabs under each transfer: DETAILS | TIMELINE | WE PAID | YOU PAID
- If you haven’t made the payment yet, click on PAY NOW.
- After making the payment, SEND RECEIPTS and allow a few hours for payment approval, depending on the method used.
- To correct any recipient details, click EDIT RECIPIENT to make the necessary updates.
 Timeline
- The TIMELINE tab shows the progress of an order, from creation time to final settlement.
 Transaction Breakdown
The WE PAID tab provides a summary of all payments made to the recipient’s account, including amounts, statuses, dates, and references on your statement.
If you need a bank receipt you can download them directly or request for one, right from this tab.

If you have further queries, please check Help & Support or contact us.


